CAS_STEM: Exposiciones del curso 2013-2014

Exposiciones del Departamento de Ciencias y Tecnologías

del Colegio Apostol Santiago.

Curso 2013-2014

  • En el primer trimestre los alumnos de Bioloxía e Xeoloxía de 4º de ESO hicieron un trabajo de investigación sobre los científicos más relevantes en el conocimiento de las células. Entre todos los grupos crearon un cartel en formato línea del tiempo que expusimos en el pasillo del 3º y 4º.

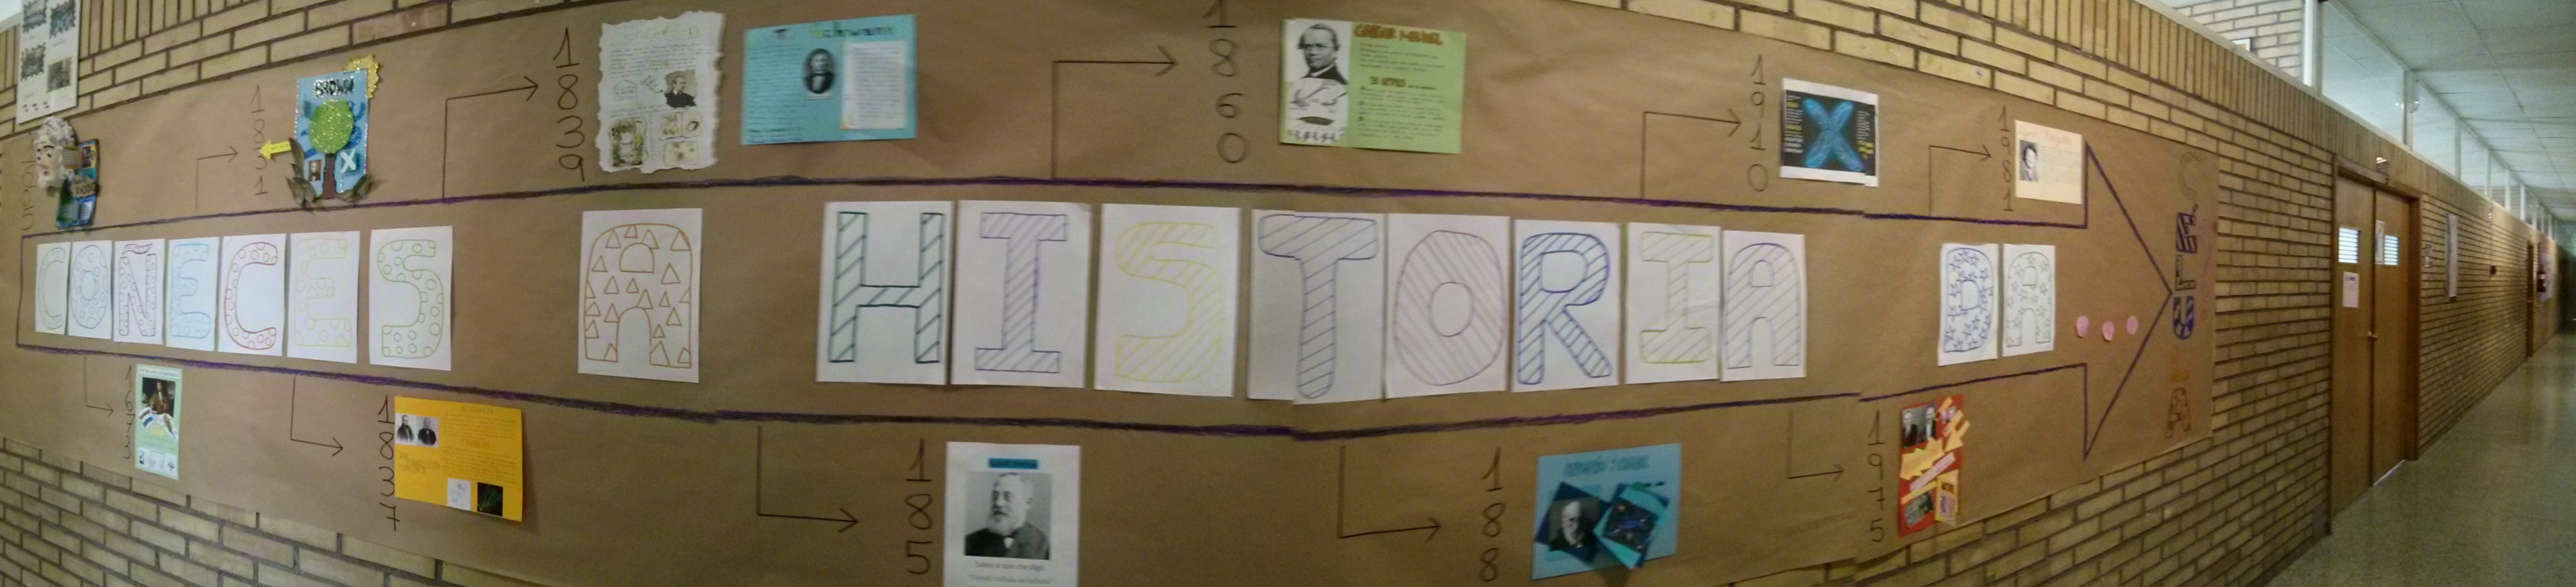
Fotografía panorámica del cartel con la línea del tiempo de la investigación sobre la célula

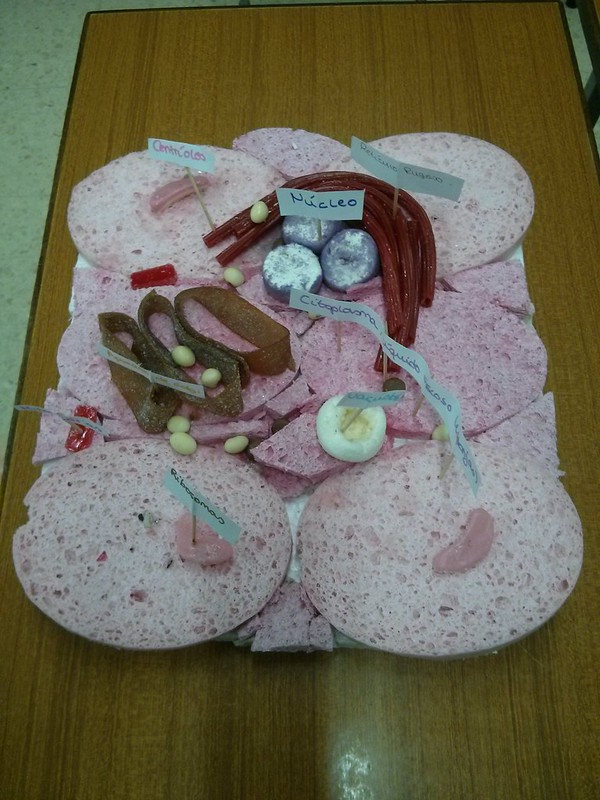
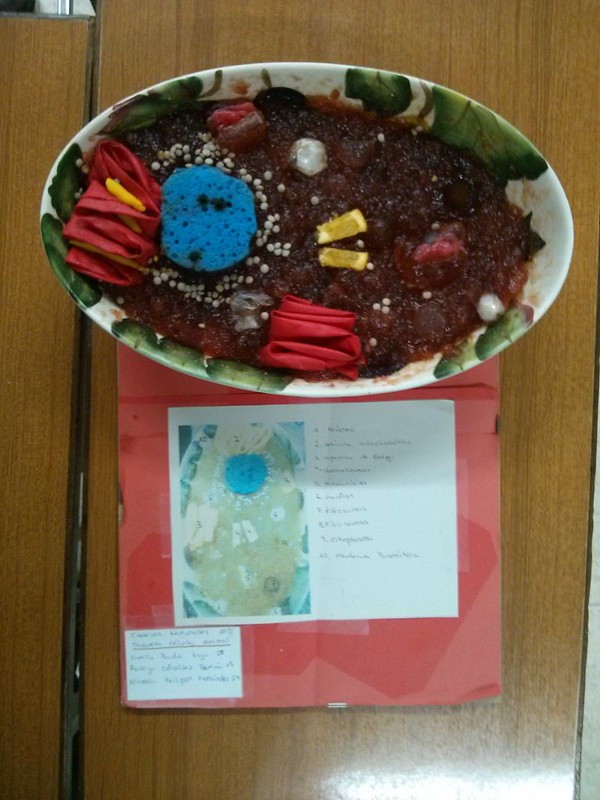
  • Durante el 2º trimestre del curso 2013-2014 se organizó una exposición en el hall del salón de actos con las células construídas por los alumnos de Ciencias Naturales de 1º ESO bajo la tutela de Javier Bayo. A continuación podéis ver algunas fotos y un video muy cortito para apreciar como el citoplasma de una de ellas se mueve:

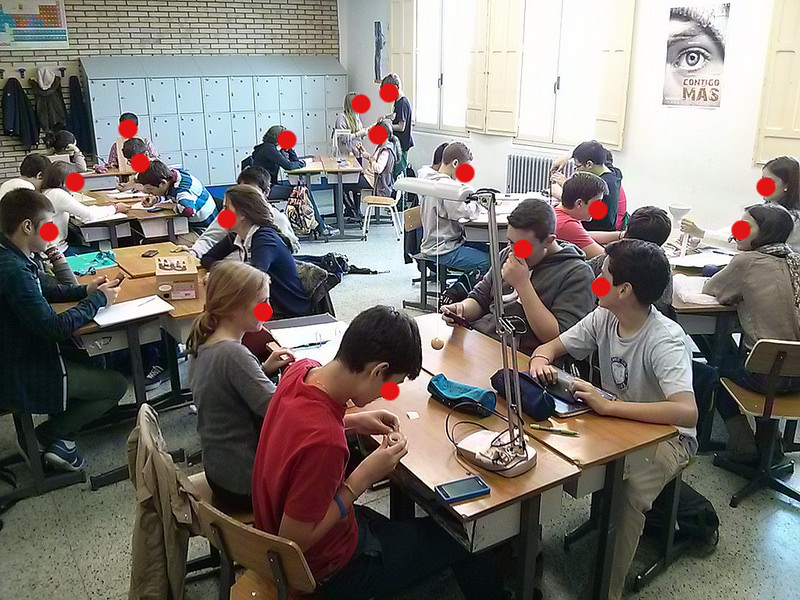
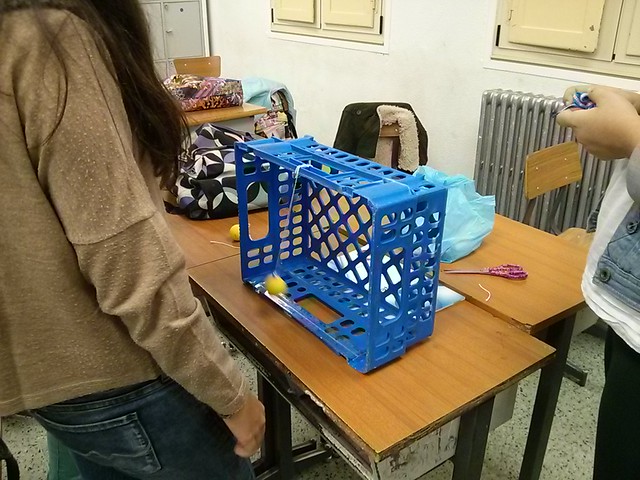
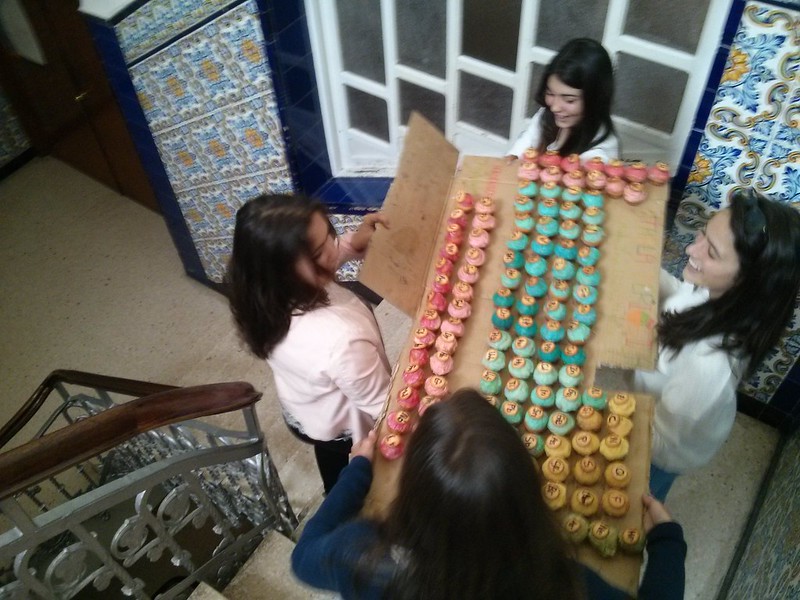
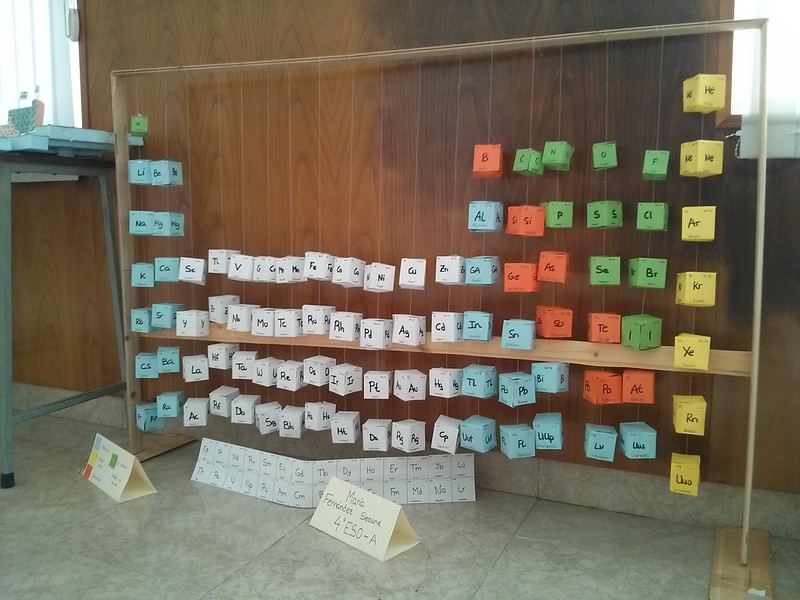
  • En el mes de Mayo, los alumnos de Física y Química de 3º de ESO expusieron sus tablas periódicas creadas con diversos materiales y en 3D. A esta iniciativa se sumaron atambién alumnos de distintas materias y cursos relacionadas con el departamento de Ciencias y Tecnologías.

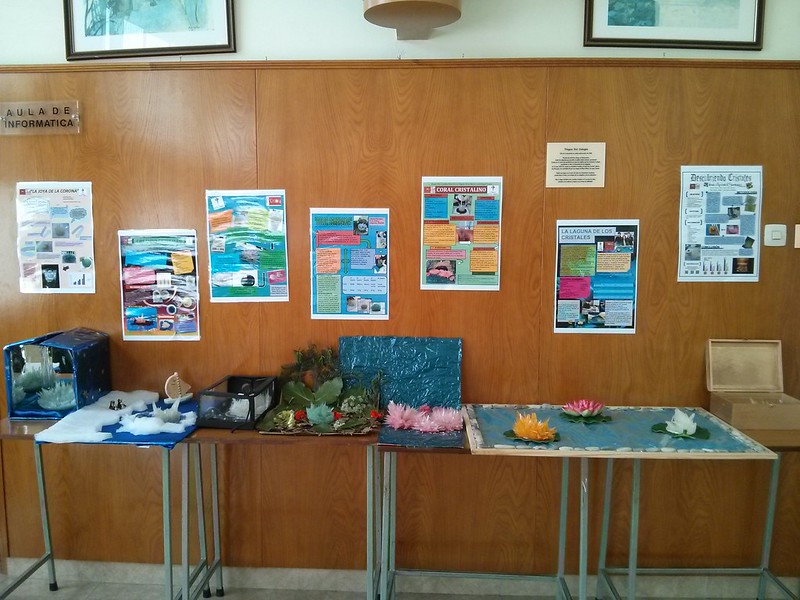
  • Los alumnos de Biología de 1º de Bachillerato bajo la supervisión de Irene Valverde participaron en un proyecto relacionado con la obtención de cristales a partir de la cristalización de sales.

CAS_ICT: Using ICT tools for teaching Sciences

ICT for Chemistry and Physics Grade 9th

  • To teach Chemistry and Physics we use Moodle as our LMS. With Moodle we went beyond a repository and we set up many and different learning activities as for example:
    • A choice activity to choose an independent variable for a scientific project
    • One assignment to submit final reports about pendulum experiments performed in groups. That assignment was linked to a rubric that was used for grading their works.
    • Two main forums:
      • One used as a Digital Notebook where students:
        • Reflect on their own performance after each exam
        • Wrote hypothesis about:
          • heating and cooling curves of water
          • Solubility of substances in different solvents
      • Another used as a QA forum where students posted their questions, comments about each topic. Valuable contributions to that QA forum were rewarded with extra points
    • We tweaked the Glossary activity in Moodle to collect and share charts from a heating curve of water experiment. Students could create the chart using a software tool as for example and spreadsheet or manually but for submitting they had to convert it into a digital graphical file (png, jpg or svg).
    • 11 Moodle Lessons throughout which they explored different topics at their own pace at home.
    • We did 6 summative quizzes and 3 as extra practise for formative assessment
    • We used the Moodle Workshop activity to collect student’s reports about an experiment with colas drinks in bad conditions that they carried out in a Java Virtual Lab. After collecting all submissions we started a peer review activity where each work submitted was assessed by five different reviewers using a predefined rubric.
  • We used a Java Virtual Lab to find out cola drink samples which were in bad conditions
  • All groups who did a 3D periodic table of elements had to record a short video to show/present their work. They had to upload these videos to their personal accounts in YouTube and share them with me.
  • Another requirement in the 3D periodic table of elements project was to use Twitter to tweet about the project, components, a picture and a link to their video in YouTube. To allow me to collect all tweets they had to use a predefined hashtag  #TP3D
  • For collaborative work we used Google Drive Tools and YouTube.
  • We used an ePortfolio for Science where students collected, stored and reflected on their own learning.

Biology and Geology Grade 9th

    • To teach Biology and Geology we also use Moodle as our LMS. With Moodle we went beyond a repository and we set up many and different learning activities as for example:
      • A choice activity to let student to decide if they preferred to prepare a topic and take a summative quiz or to create a digital poster and present it.
      • We used two Moodle assignments, o their Science ePortfolio at the end of the course. Both assignments were linked to a predefined rubric that was used for marking
      • Two main forums:
        • One used as a Digital Notebook where students:
          • Reflect on their own performance after each exam
          • Did an activity about Body Mass Index and Basal Metabolic rates
          • Share their annotations about a video-lesson
        • Another used as a QA forum where students posted their questions, comments about each topic. Valuable contributions to that QA forum were rewarded with extra points
      • We tweaked the Glossary activity in Moodle to collect and share charts from a heating curve of water experiment. Students could create the chart using a software tool as for example and spreadsheet or manually but for submitting they had to convert it into a digital graphical file (png, jpg or svg).
      • 1 Moodle Lessons throughout which they explored a Cell Structure topic at their own pace at home.
      • 3 SCORM activities about different topics
      • We did 6 summative quizzes and 3 as extra practise for formative assessment
      • We used the Moodle Workshop activity to collect student’s reports about an experiment with colas drinks in bad conditions that they carried out in a Java Virtual Lab. After collecting all submissions we started a peer review activity where each work submitted was assessed by five different reviewers using a predefined rubric.
  • We gamified
  • Present a given body system through a Digital poster using webtools like Gdrive draw, Prezi, ..

Examples made with Glogster: (To see original posters click on links below)

Original URL: http://edu.glogengine.com/view/P0kzx6Oot2cbJiUKnJvg:6juc1p50pp85598707jknkf

Original URL: http://edu.glogengine.com/view/X3w1uFcv4dmIee1qMzDq:6jubm8sth52naihesbb0hhs

A Youtube video where a brilliant student explains his own Glogster (Very cool!)

Examples made with Prezi, some of them in a Pecha Kucha Style (20 slides x 20 sec) including audio

  • Creating a personal e-portfolio post compiling all we’ve done in STEM subjects along the course. Digital evidences and a learning reflection about the course were also required.

Biology and Geology Grade 10th

  • Research about relevant scientist who provides useful knowledge for cells. Final products were:
    • A video: The first example shows a team of girls imitating Watson and Crick to present their findings about DNA. They are speaking in Galician language: [embedyt]http://www.youtube.com/watch?v=cafuaZjxNnA[/embedyt]
      Next example shows Robert Hooke, who coined the term ‘cell’, talking about his scientific contribution: [embedyt]http://www.youtube.com/watch?v=0TEiyynpx0c[/embedyt]
    • A poster
  • Presenting in Prezi and with audio a biome in 6:40 min (Pecha Kucha style)

Some examples with Prezi:


  • Creating a personal e-portfolio post compiling all we’ve done in STEM subjects along the course. Digital evidences and a learning reflection about their performance along the course were also required.

Digital evidences coming soon…

CAS_STEM: Projects Based Learning 2013-2014

 Chemistry and Physics Grade 9th

  • Building a pendulum for testing an hypothesis (scientific methodology).


  •  Using a Java Virtual Lab to find out cola samples which are in bad conditions
  • Submission of personal Science e-Portfolios to participate in a course peer asessment


Biology and Geology Grade 10th

  •  Research about relevant scientist who provides useful knowledge for cells. Final products were:
    • A video: The first example shows a team of girls imitating Watson and Crick to present their findings about DNA. They are speaking in Galician language: [embedyt]http://www.youtube.com/watch?v=cafuaZjxNnA[/embedyt]
      Next example shows Robert Hooke, who coined the term ‘cell’, talking about his scientific contribution: [embedyt]http://www.youtube.com/watch?v=0TEiyynpx0c[/embedyt]
    • A poster

  • Presenting in Prezi and with audio a biome in 6:40 min (Pecha Kucha style)

Some examples:


  • Creating a personal e-portfolio post compiling all we’ve done in STEM subjects along the course. Digital evidences and a learning reflection about them were required.

Digital evidences coming soon…

I’ve just joined to Open Content Licensing for Educators (OCL4Ed)

OER Logo

OER Logo

Although a litle bit late I’ve just joined to a course called ‘Open Content Licensing for Educators‘. This course is delivered by OERu and the goal is to learn about the concepts of open educational resources, copyright and Creative Commons open licenses to achieve more sustainable education for all.

I started some years ago to read about OER and Creative Commons. Some of my last post in this blog are related to these topics. For example three recent posts were:

The first activity (Activity 0.1) consists on creating a blog in WordPress or Blogspot. As I already had this personal blog based on WP, I could jumped to the next part of the activity where the requirement is providing content. A few paragraphs (about 300 words in total) introducing myself and what I would like to achieve by maintaining a blog to support my learning was the first piece of content required.

I’m not going to be too descriptive about myself in this post because I already posted about me in About me and you can read my updated CV linked from the right menu of this blog.

Another requirement was to insert an image, properly attributed with the necessary permissions for reuse, so I went to Wikimedia and found the OER logo under a CC-BY-SA-3.0 license. I inserted the OER logo that you can see at the top of this post.

This post will be tagged with the course tag #OCL4Ed to meet another useful requirement for this activity. The last task consist on inviting someone else to add a comment to this post so if you’re reading this post, please take a minute to comment it. 🙂

I’ll keep posting about my experience along this course.

Thanks for reading

Evaluación de un alumno a través de la defensa de su Portfolio

Buscando información sobre nuevos modelos de evaluación llegué a dos vídeos que recogen una experiencia de evaluación de alumnos a través de la defensa de su portfolio.

Creo que es un ejemplo muy ilustrativo del valor que tiene el portfolio como herramienta educativa y, cómo podemos evaluar a un alumno a través de el.

El primer vídeo (7:33) recoge la experiencia del alumno y su presentación.

http://vimeo.com/user11426713/review/85306914/cba622705c

El segundo vídeo (4:14) recoge las reflexiones del equipo de profesores ante el reto de evaluar objetivamente a través de la defensa del portfolio.

http://vimeo.com/user11426713/review/85370093/19cedbc691


Insertar un Objeto de Aprendizaje de OpenStax CNX en Moodle

Recientemente y como parte de un trabajo en la materia de Fundamentos Tecnológicos del eLearning del Máster en eLearning de la UOC  tuvimos que debatir sobre los objetos de aprendizaje del repositorio OpenStax CNX (anteriormente Connexions). Este repositorio fundado en el año 1999 por el Dr. Richard Baraniuk nos ofrece recursos educativos (Objetos de Aprendizaje) con licencia Creative Commons de contenido abierto. Su objetivo es que todo el material educativo creado se comparta y se reutilice. Cualquiera puede descargar material pero, si lo desea, puede abrir una cuenta y crear nuevo material reutilizando contenido creado por otros.

El motivo de esta entrada es mostrar cómo se puede incorporar a  Moodle una colección de páginas que hayamos descargado de OpenStax CNX y de tal modo que mantengan el formato HTML navegable original. Aunque también existe la posibilidad de descargar colecciones de páginas en formato PDF, lo cierto es que cuando son muchas páginas el formato PDF no es una opción muy recomendable.

Ojalá algún día OpenStax CNX y/o Moodle nos hagan este proceso más rápido y sencillo para incorporar páginas al recurso ‘Libro de Moodle‘. En mi opinión el recurso ‘Libro’ de Moodle sería el contenedor más apropiado para estas páginas descargadas de OpenStax CNX.

Mientras eso no ocurre aquí tenéis un video-tutorial donde explico cómo proceder: